Category Archives: Helpful Tips

Weight Loss And Weight Control – Part I

Even being a vegetarian for 17 years hasn’t prevented me from falling victim to one of America’s biggest problems – overeating and being overweight.  I’m 6’1″ and my idea weight is around 175.  At my heaviest I was over 210.  No, that isn’t a huge deal, but it really slowed me down and made me feel bad about myself.

I got in the habit of eating for comfort and eating because I felt like it.  Over the course of about 6 months, I lost over 35 pounds and got back down to 175.  Since then, I have successfully kept the weight off and now manage to stay between 175 and 180.  Adjust the numbers for your own height and body type, but I can share with you how I managed to lose my weight and keep it off.  I found a nice, simple ideal weight calculator at this site.

Over the next few posts, I will share several of the best tips of things that have worked for me, including the one thing that I did that helped me shed 10 pounds in a matter of a few weeks.  Also, I have some great observations on what has happened to my body and how it can traslate to helping you lose weight and keep it off.

Clean Space – Clean Mind

This is a really simple thing, but I continually forget and rediscover the benefits of this one.  The tip is: clean up your space!  This can be your office, home office, living room, kitchen, anywhere that you work.  If you are having a hard time concentrating or working then look around you and see if you are surrounded by clutter.  Taking 10 minutes to clean up your workspace will save you more lost time in the long run.  It also has the added benefit of clearing your mind so you can think better.  If you haven’t touched something in a while, then you probably don’t need it so recycle it, throw it out, sell it, or donate it.  You will feel much better with less stuff around you.

I hadn’t updated this blog in a while and it was a little daunting to think about all the things I wanted to acomplish.  I have a list of topics I’m waiting to get down on the site and also a ton of ideas in my head for the site design.  Before beginning I took a few minutes and cleaned up my home office and now I feel like I can go all night!

This is a great starting point for my future topic of reducing your possesions to live a simpler life.  I’ll link to it from here once I get it written.

Also, this is a great place to introduce a new concept that I call Logan Challenges.  These will be simple things that I challenge you to do.  Post a comment about what you did and the results.  So here is your first Logan Challenge – clean up the space you are working in right now!

Keeping Your Nose Clean – Part 2

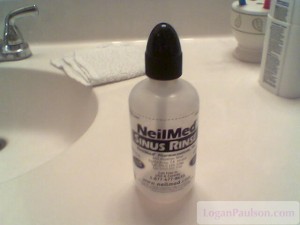
The other day I posted about using a neti pot and the benefits I have gotten from that.  There is an alternative which is similar, but a little easier to use called the NeilMed system.  The concept is the same as the neti pot- it is a salt water rinse of the nose.  It uses pressurized salt water instead of relying on gravity like the neti pot does.

Why

I like the neti pot and ususally stick to using that system.  I do like to occasionally use the NeilMed either for a change of pace, or when the pressurized flow is helpful, like when I am a little bit congested.

The other reason I use the NeilMed is for my children.  For anyone younger or anyone who has struggled trying the neti pot this is a great alternative.  I can help use the NeilMed squeeze bottle on them when it would be much harder to try to help get all the angles right and tip the pot just right.

Adult NeilMed squeeze bottle

Adult NeilMed squeeze bottle

The System

NeilMed squeeze bottles are available at many drug stores.  I have found them locally at WalGreens, CVS, and places like Target.  They sell them in adult and pediatric sizes.  When you initially purchase a bottle it usually comes with a supply of little packets of pre-measued salt to make a proper salt solution.  There are different packets available for adult, adult extra-salty, and pediatric to match your needs and type of bottle.  Once you have used up your supply of included salt packets they sell refil kits so you can just buy the salt without the bottle.  I have found that the pediatric refills are harder to find and had to go to a specialty local pharmacy to find them.

The Salt

Here again, it is much cheaper to buy salt in bulk and measure it out yourself.  I do find that my kids don’t like the “sea” quality of the sea salt I buy, and the packets are very convenient for them, so I do buy the pediatric refills.  The packets are premeasured and easy to use and the salt is a special blend and seems to be very mild.

Process

The process is very similar to the neti pot.  Start by running the hot water until it is warm, but not hot.  You can either put the salt in first or water in first, but get them both into the bottle.  Screw the cap on tight, put your finger over the hole and turn the bottle upside down to mix the salt, and then you are ready to go.  Tilt your head slightly to the left and insert the bottle tip into the right nostril.  Now squeeze firmly – I’ve found that slow and steady squeezing works the best.  You can either use the entire bottle up and repeat for the other side, or switch sides when the bottle is about half full.

Be very careful of using too much squeeze pressure.  You can easily force water out towards your ears – especially if you are a little congested – and this is very unpleasant.

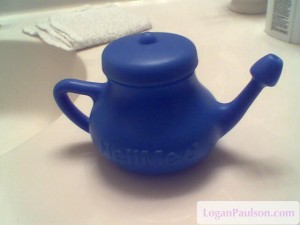
NeilMed plastic neti pot

NeilMed plastic neti pot

Other Thoughts

NeilMed includes a nice detailed pamphlet along with their products.  It is a good read to get more information on the benefits of salt water rinsing of the nose.  Also of note is that they sell a pretty decent plastic net pot like the one pictured here which is a good way to try that route out.

Keeping Your Nose Clean

Allergies are a huge problem in our society.  I used to suffer like lots of people.  I took an almost daily cocktail of Zyrtec and 2 Advil to keep the terrible sinus headaches at bay.

Last year I started doing one thing and was able to stop taking medication and over a year later, my allergies are still manageable.  I still occasionally get sinus headaches, but just taking an occasional Advil is much better than taking something every day.  Got your interest?

The thing that worked for me is the neti pot.  It is also called nasal irrigation or nasal lavage and is basically a salt water rinse of the nose.  Several doctors had previously recommended it casually to me, but it really should be recommended more strongly.
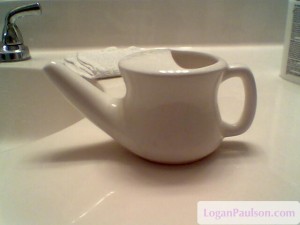
simple ceramic neti pot

simple ceramic neti pot

The Pot

I have a simple ceramic pot that I got at Whole Foods, our local health store chain.  They also come in plastic, glass, or metal.  I have tried the ceramic and plastic and can’t tell much difference.  Just get one and try it and you can always replace it with something else later.
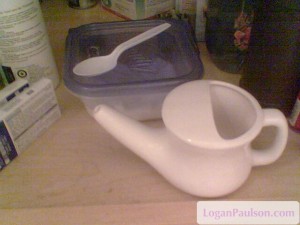
The setup under my sink - salt box and pot

The setup under my sink - salt box and pot

The Salt

You could purchase specially formulated salt, but the price adds up quickly.  I recommend getting bulk sea salt from your local health food store.  A big bag will be less than a dollar and will last several months.  Managing that much salt can easily be a mess.  Do *not* keep it in a bag.  It will make it too hard to manage and you won’t keep up with it.  I put mine in a disposable Ziploc Tupperware box and keep it under the sink with my neti pot.  Keep a plastic spoon on top and figure out through trial and error how much salt you like in the mix.

The Process

First, make sure you have a box of tissues on your counter right next to the sink within reach.  You’ll appreciate this later.  Let the hot tap water run for a bit to warm up while you spoon some salt into the pot.  Fill the pot up with warm – almost hot water.  Too hot and it can easily burn your sensitive nasal membranes.  Too cold and it feels strange and bad.  Stir it with the spoon.  Now the actual process takes some trial and error to get right, but you will know when it is working.  Lean over your sink and tilt your head to the left and put the tip of the pot into the right nostril.  You have two variables to adjust – the tilt of your head and the tilt of the pot.  If you tilt the pot too much then the water comes out the top of the pot.  If this happens, you need to tilt your head more and the pot less.  When done right, the water will go in the right nostril and pour out the left nostril.  Now you can tilt your head to the right and put the pot into the left nostril and do the same for the other side.

I do this daily and on regular days I do one pot between both nostrils switching about half way.  Occasionally – maybe one a week or so – I will do one full pot for each nostril.

The Finish

When you are done you will still have salt water in your sinuses and dripping out your nose.  Grab a tissue (you did remember to put the box close, right?) and gently blow your nose.  Do not hold one or both of your nostrils closed!  Just blow gently but firmly out of both nostrils.  If you hold one side you can easily force salt water back up the sinuses towards your ears.  This can feel uncomfortable and is not a very pleasant sensation.  Next, lean over at the waist and tuck your chin to your chest.  Wait a few seconds for the salt water to drain and then blow your nose again.  Do the same thing here with a gentle but firm blow out both nostrils.

Advanced

What I outlined above is considered Level 1 of Jala Neti.  It cleanses the upper nasal sinuses and is what I do on a daily basis.  This is good enough and you can get great relief from allergies and sinus irritation by doing only the Level 1 steps.  If you are interested, there are additionally levels 2 and 3.  I’ll cover these in future posts in more detail.

A few minutes a day can make a life-changing difference.  I love not having to rely on allergy drugs and my extreme headaches are much less frequent.  Have you had a positive – or bad – experience using a neti pot?  Comment below and tell me about it.

New Year’s 2009

Happy New Year’s 2009!

As we start another new year, it is an excellent time to think about resolutions for living better.  I want you to live better and by making resolutions that actually work you can progress on your path to living better.  In this article I will offer some tips for making resolutions.  In a follow-up I will detail my own resolutions and then check back in later to see how I am doing.

Be Realistic

Don’t make a resolution you know you will never manage to keep.  If you are behind from the start, then this will only serve to depress and upset you.  Find things that are realistic and that you are excited about.  Even taking a small step will improve your spirits and that can help motivate you to stick with it.

Be Specific

Don’t make generic resolutions like “I’m going to lose weight and exercise more”.  Instead be specific like “I’m going to lose 5 pounds” and “I’m going to walk for 30 minutes once a week”.  This way you have a tangible goal to meet and it will be clear if you are following the resolutions.

Write It Down

It is much easier to let a resolution slide if you just made it up in your head.  Take the time to write your resolutions down.  Do something like writing them on paper and hanging it up somewhere that you will keep seeing it or write it on the web in your own blog or facebook/myspace/twitter/personal web page.

Don’t Get Discouraged

If you fall short of your resolution or skip a few days/weeks/months, don’t get discouraged.  There is nothing stopping you from starting back up with your resolution and getting back into it.  Instead of feeling like you have failed, give yourself a break and make the most of it.